- Other Fluke companies:
- Fluke
- Fluke Biomedical
- Fluke Networks
- Fluke Process Instruments
Durable, accurate sensors for use in the factory, field or lab
- Affordable wide-range accuracy
- Calibrated accuracy ± 0.012 °C at 0 °C
- Reference-grade platinum sensing element
- NVLAP-accredited calibration included, lab code 200706-0
For years, you’ve relied on our 5612, 5613, and 5614 Secondary Reference Probes. These field-durable, lab-accurate PRTs have been replaced by the 5615, which comes with a NVLAP accredited calibration.
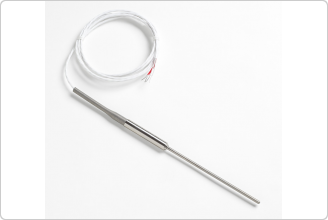
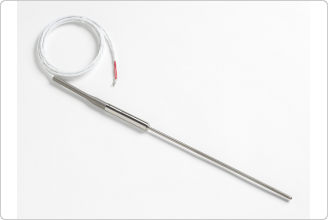
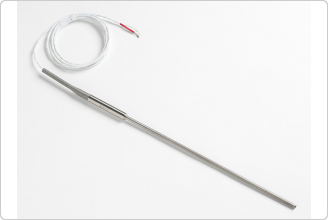
The 5615-12 (formerly Hart Scientific) is a Platinum Resistance Thermometer (PRT) with an Inconel™ 600 sheath that’s 305 mm (12 in) long and 6.35 mm (0.250 in) in diameter. It is a secondary reference temperature standard designed to bridge the gap between the highest laboratory standards and industrial or second-tier lab locations. It has accuracy of ± 0.012 °C at 0.01 °C.
The element is constructed of reference-grade platinum wire (99.999 % pure) for excellent stability. The wire is wound in a coil and placed in a mandrel where it’s uniformly supported in a manner that virtually eliminates hysteresis. The electrical configuration is a four-wire current-potential hookup that eliminate the effects of lead-wire resistance.
These Inconel™-sheathed probes have a fully supported sensing element, making them more durable than SPRTs. The element is protected in an ultrahigh-purity ceramic case with a hermetic glass seal to improve output stability by locking out moisture and contaminants.
This probe comes calibrated with ITS-90 coefficients, making it compatible with many excellent readout devices, including Fluke Calibration’s 1529 Chub-E4, 1560 Black Stack, and 1502A Tweener. It bridges the gap between a 100-ohm industrial RTD and an SPRT.
For those needing faster thermal response, or where diameter and immersion depth are problems, order the 5615-9 or 5615-6. These probes are excellent reference probes for comparison calibrations in a Fluke Calibration dry-well. The sheaths of the 5615-6 and 5615-9 are 4.76 mm (0.188 in) in diameter.
A printout of sensor resistance is provided in 1 °C increments for each probe. The 5615-9 and 5615-12 are calibrated from –196 °C to 420 °C. The 5615-6 is calibrated to 300 °C.
We’ve tested many of the probes on the market. We’ve used them in our manufacturing facility and tested them in the lab, and this is an excellent secondary standards PRT. Other instruments on the market are priced much higher, have lower stability, or are of lower quality.
Remember, these are reliable instruments and each probe comes with its own individual NVLAP-accredited calibration, lab code 200706-0.
Specifications |
|||||||||||||||||
| Temperature range |
5615-12 and 5615-9: –200 °C to 420 °C 5615-6: –200 °C to 300 °C |
||||||||||||||||
| Nominal resistance at 0 °C | 100 Ω ± 0.10 Ω | ||||||||||||||||
| Temperature coefficient | 0.0039250 Ω/Ω/°C | ||||||||||||||||
| Accuracy[1] |
± 0.024 °C at –200 °C ± 0.012 °C at 0 °C ± 0.035 °C at 420 °CC |
||||||||||||||||
| Short-term repeatability[2] | ± 0.009 °C at 0.010 °C | ||||||||||||||||
| Drift[3] | ± 0.007 °C at 0.010 °C | ||||||||||||||||
| Sensor length | 28 mm (1.1 in) | ||||||||||||||||
| Sensor location | 6.9 mm ± 3.3 mm from tip (0.27 in ± 0.13 in) | ||||||||||||||||
| Sheath dimensions | 5615-6: 152 mm x 4.76 mm (6.0 in x 0.188 in) 5615-9: 229 mm x 4.76 mm (9.0 in x 0.188 in) 5615-12: 305 mm x 6.35 mm (12.0 in x 0.250 in) |
||||||||||||||||
| Sheath diameter tolerance | ± 0.127 mm (± 0.005 in) | ||||||||||||||||
| Sheath material | Inconel™ 600 | ||||||||||||||||
| Minimum insulation resistance | 1000 MΩ at 23 °C | ||||||||||||||||
| Transition junction temperature range[4] | –50 °C to 200 °C |
||||||||||||||||
| Transition junction dimensions | 71 mm x 13 mm dia (2.8 in x 0.5 in) | ||||||||||||||||
| Maximum immersion length |
5615-6: 102 mm (4 in) 5615-9: 178 mm (7 in) 5615-12: 254 mm (10 in) |
||||||||||||||||
| Response time[5] | 9 seconds typical | ||||||||||||||||
| Self heating (in 0 °C bath) | 50 mW/°C | ||||||||||||||||
| Lead-wire cable type | PTFE insulated with PTFE jacket, 22 AWG | ||||||||||||||||
| Lead-wire length | 183 cm (72 in or 6 ft) | ||||||||||||||||
| Lead-wire temperature range | –50 °C to 200 °C | ||||||||||||||||
| Calibration |
NVLAP-accredited calibration included, lab code 200706-0. Please see calibration uncertainty table and its explanation of changeable uncertainties. |
||||||||||||||||
|
[1] Includes calibration and 100 hr drift (k=2) [2] Three thermal cycles from min to max temp, includes hysteresis, 95 % confidence (k=2) [3] After 100 hrs at max temp, 95 % confidence (k=2) [4] Temperatures outside this range will cause irreparable damage. For best performance, transition junction should not be too hot to touch. [5] Per ASTM E 644 |
|
||||||||||||||||
| Model Name | Description |
|---|---|
| 5615-6-X |
Secondary Standard PRT, 4.76 mm x 152 mm (0.188 x 6.0 in), –200 °C to 300 °C, lead wire (cable) 6 ft (17025 accredited calibration included. Traceable to NIST standards.) X = termination. Specify “A" (INFO-CON for 914X), “B" (bare wire), “D" (5-pin DIN for Tweener Thermometers), “G" (gold pins), “J" (banana plugs), “L" (mini spade lugs), “M" (mini banana plugs), “P" (INFO-CON for 1523 or 1524), or “S" (spade lugs). |
| 5615-9-X |
Secondary Standard PRT, 4.76 mm x 229 mm (0.188 x 9.0 in), –200 °C to 420 °C, lead wire (cable) 6 ft (17025 accredited calibration included. Traceable to NIST standards.) X = termination. Specify “A" (INFO-CON for 914X), “B" (bare wire), “D" (5-pin DIN for Tweener Thermometers), “G" (gold pins), “J" (banana plugs), “L" (mini spade lugs), “M" (mini banana plugs), “P" (INFO-CON for 1523 or 1524), or “S" (spade lugs). |
| 5615-12-X |
Secondary Standard PRT, 6.35 mm x 305 mm (0.250 x 12.0 in), –200 °C to 420 °C, lead wire (cable) 6 ft (17025 accredited calibration included. Traceable to NIST standards.) X = termination. Specify “A" (INFO-CON for 914X), “B" (bare wire), “D" (5-pin DIN for Tweener Thermometers), “G" (gold pins), “J" (banana plugs), “L" (mini spade lugs), “M" (mini banana plugs), “P" (INFO-CON for 1523 or 1524), or “S" (spade lugs). |
Accessories common to all models:
| Accessory | Description |
|---|---|
| 2601 |
Probe Carrying Case, Plastic |
| Product Manuals |
|---|
| Data Sheets |
|---|
| On-Demand Webinars |
|---|
| Overcoming Drift: Tips to Maintaining Your PRTs |
- Home
- Products
- New Products
- Electrical Calibration
- RF Calibration
- Data Acquisition and Test Equipment
- Temperature Calibration
- Humidity Calibration
- Pressure Calibration
- Flow Calibration
- Process Calibration Tools
- Calibration Software
- Service and Support
- All Calibration Instruments
- Handheld Test Tools
- Purchase Info
- News
- Training and Events
- Literature and Education
- Service and Support
- About Us
Sidebar Request a Quote
Request a quote


