- Other Fluke companies:
- Fluke
- Fluke Biomedical
- Fluke Networks
- Fluke Process Instruments
Digital and Analog Pressure Gauge Calibration Tips
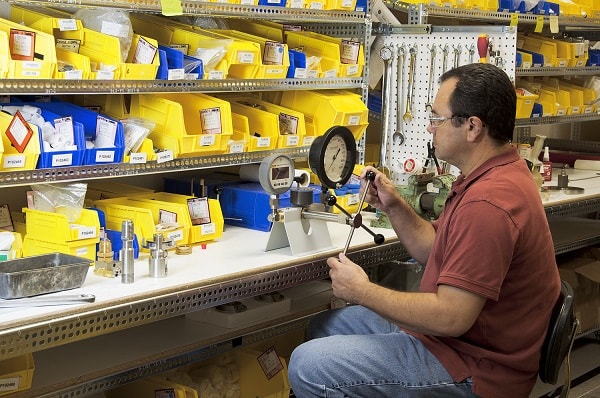
Analog pressure gauges are still widely used because they are relatively inexpensive and can do the job for many applications. Digital pressure gauges may be more expensive than an equivalent analog gauge because they are generally more accurate due to the nature of the display and the technology behind it.
There is a fair amount of overlap in applications where you can use a digital or analog gauge interchangeably. However, the difference in design and technology, means that calibration requires a separate approach for each.
The anatomy of a pressure gauge
The first most obvious reason for different calibration procedures lies in the internal construction of the gauges.
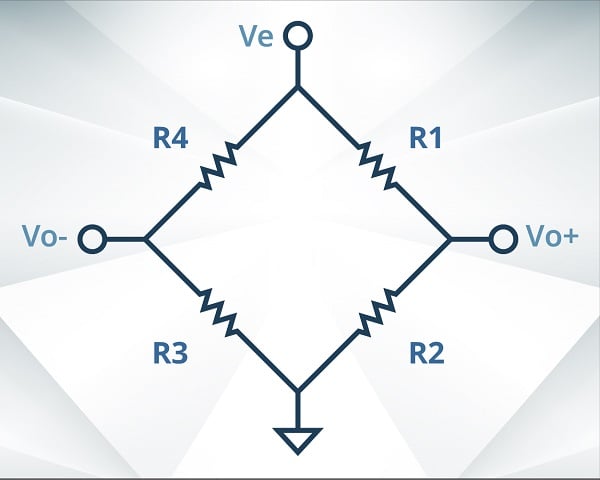
Digital gauges generally have compact piezoresistive sensors. There are fewer moving parts and the components are nearly solid state so not as subject to mechanical disruptions. However, digital gauge accuracy may be dependent on local temperature. Higher end gauges may include internal temperature compensation or a derating factor for temperatures that are outside a specific temperature range. If possible, calibrate the gauge at the temperature at which it will be used
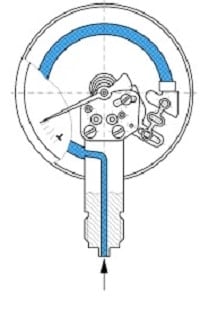
Analog gauges, on the other hand, have a lot of moving parts. Inside the gauge is a bourdon tube, which is a thin-walled coiled tube that straightens out under pressure. A bourdon tube works basically like a party horn which has a long, flattened coil of paper that straightens out when someone blows into the mouthpiece. The bourdon tube straightens out in proportion to the amount of pressure applied and drives the gear train that drives the pointer back and forth across the face of the gauge.
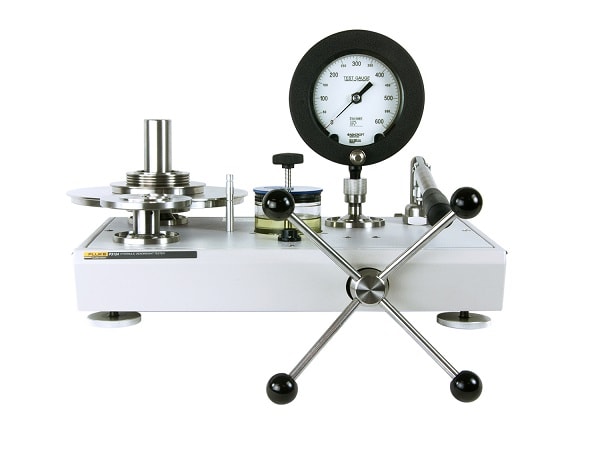
Analog pressure gauge calibration tips
Because an analog pressure gauge has a lot more moving parts than a digital gauge it requires more steps to prepare for an accurate calibration. The following are a few steps you can take to ensure more repeatable results when calibrating analog gauges:
- Exercise the gauge. Because analog gauges are mechanical instruments, they are subject to mechanical effects. You can minimize these effects and loosen up the gear train by exercising the bourdon tube over its full range of motion prior to calibration. Simply apply pressure to take the gauge from low scale condition to full scale and back several times. Although this step is not required, you should be consistent. If you exercise a gauge before one calibration, you should repeat the exercise before every future calibration. Doing it inconsistently can lead to divergent results.
- Dithering. Here’s an example where dithering is a good thing. Just tap on the gauge to settle the indicator into position. This removes some of the transient mechanical tension on the gear train that might lead to subtle differences in the position of the needle. As with exercising, if you perform this for one calibration you should do the same before every subsequent calibration of the gauge.
- Set cardinal points. With an analog gauge it is more difficult to distinguish smaller increments of pressure measurements. For example, in this gauge if the needle was just below the 50-psi mark it would be difficult to determine the exact value indicated. To make it easier, you can set the needle right on the 50-psi mark (the cardinal point), then read the digital standard, which will give you the precise value, say 49.75 psi. The difference between the two is the error that the device is introducing. The digital display allows you to easily distinguish small incremental differences that would be impossible to see on an analog gauge. This procedure supports better consistency because it avoids human interpolation of where that needle actually is.
(Note: This is a simplification because it ignores the potential error of the device used as the standard. But determining that difference is much easier if the device with the most subjective interpretation—the pressure gauge—can be nailed down to an exact value and the device that always shows a value that requires no interpretation—the digital standard—is left to settle wherever it settles.
- Address Parallax Distortion (The “off to one side problem”). When observing an analog gauge you have to keep in mind that you’ll probably see a different value when you view it straight on than if you view the gauge from the side. This is especially true with higher end gauges, including those used as calibration standards. A higher-end gauge, say with +/-1% accuracy, would have 100 indication marks. If the parallax is enough to put you off by two of those marks, the measurement would be wrong and the parallax error would become dominant.
To avoid this problem, higher-end gauges may have a pointer that is squeezed down to a fine line at the tip rather than a blunt point. Some also may have a mirror on the face of the scale so you can line up the mirror image of the needle with the actual needle to avoid a parallax error. A workaround for gauges that don’t have those alterations, is to have the operator always stand in the same place to take the reading.
A note about calibrating digital pressure gauges
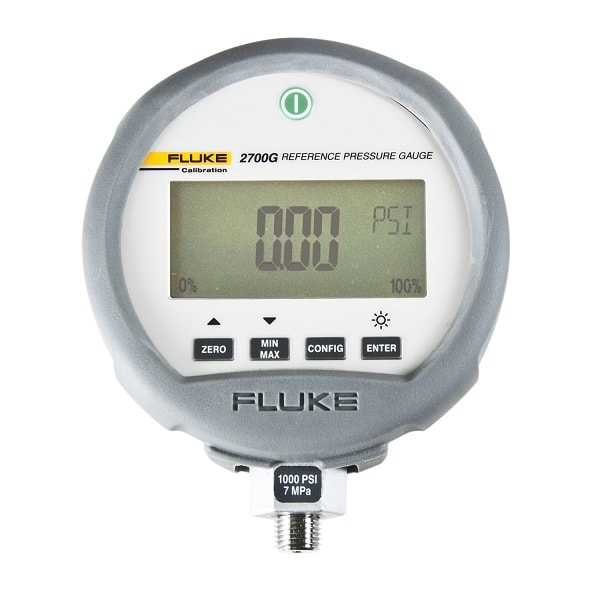
Because digital gauges have fewer mechanical parts and have a digital display, the tasks above don’t apply. However, digital gauges are electronic devices and therefore require power from a wall plug, USB port, or batteries. For those gauges that run on batteries, make sure you check the battery level before you start the calibration. Most digital gauges include a battery level indicator to let you know status. This is important because a low battery could affect the operation or accuracy of the gauge.
Keep pressure gauges clean and avoid contamination
Pneumatic standards are potentially susceptible to contamination. This is a particular danger when calibrating a bourdon tube pressure gauge that is filled with a liquid. When the pneumatic standard pressurizes the system and then the system is vented, the fluid can be drawn back as a part of depressurization. Since most pneumatic standards contain pressure control or adjustment mechanisms, they place themselves in the vent path for the system and thus in the path of fluid.
Filters are available but are not generally recommended because they can clog up with material causing a pressure differential. There are other devices such as liquid traps and dirt traps that rely on gravity to help separate contaminants from the pneumatic media. They may not be 100% effective but are better than nothing.
There is also a Contamination Prevention System on the market that integrates with the calibrator to ensure that clean, dry gas flows from the calibrator to the test stand, and that contaminated gas flows away from the calibrator, plumbing, and the device being calibrated.
If you’d like more information about how to maintain your pressure calibration standards or the differences between calibrating digital and analog pressure gauges, you can reach me by phone at 877-355-3224 or email at john.lopez@flukecal.com. We also have extensive free online learning resources, including our brand-new Education Hub, filled with content you and your staff can consume at home, as well as live and on-demand webinars.
Keep learning
How to calibrate a pressure gauge between 600 psi and 3000 psi without causing contamination
Pressure comparators and digital reference pressure gauges vs deadweight testers
Related products
2700G Series Reference Pressure Gauges
Get Help
Speak with a calibration product expert about your equipment needs
- Home
- Products
- New Products
- Electrical Calibration
- RF Calibration
- Data Acquisition and Test Equipment
- Temperature Calibration
- Humidity Calibration
- Pressure Calibration
- Flow Calibration
- Process Calibration Tools
- Calibration Software
- Service and Support
- All Calibration Instruments
- Handheld Test Tools
- Purchase Info
- News
- Training and Events
- Literature and Education
- Service and Support
- About Us


