- Other Fluke companies:
- Fluke
- Fluke Biomedical
- Fluke Networks
- Fluke Process Instruments
Five easy steps for choosing an industrial temperature readout and probe
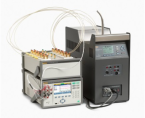
To calibrate an industrial temperature sensor like a PRT, RTD, thermistor, or thermocouple, you put the sensor into a stable industrial temperature readout like a dry-well, furnace, or calibration bath, and then compare the sensor’s output to the output of a reference standard probe connected to a thermometer readout. There are many different types of reference standard probes and thermometer readouts, and many ways to combine them, so knowing what to purchase can be a little confusing. We can help simplify the process.
In this blog post, we share five steps to follow when choosing a reference standard probe and a thermometer readout for calibrating industrial temperature sensors.
1. Ask yourself these questions before choosing the readout.
- What kind(s) of temperature sensor(s) will you be calibrating? • Will the readout be used in the field or in a calibration laboratory?
- How many channels are needed on the readout?
- Do you need to log data? See data in graphic format? Record data?
- Do you want to automate the calibration process?
2. Consider the temperature range of the sensors you’ll be testing and the required immersion depth of the reference probe.
The reference probe you select should cover the full temperature range of the sensors’ application(s). You’ll also want to make sure the probe is long enough to reach the bottom of the dry-well or the sensing element of the sensor under test in a bath.
The reference probe and the sensor under test should be at the same temperature during a comparison calibration. Therefore, the sensing elements of the reference probe and the sensor under test need to be aligned vertically. Both also need to be immersed sufficiently in the dry-well or bath to ensure accurate measurements. A general rule is that the minimum probe immersion needs to be 15 times the probe diameter plus the sensor length.
3. Determine the combined system accuracy of the readout and reference probe.
We can provide system accuracy data for various combinations of Fluke Calibration readouts and probes. For other manufacturers’ products, please check the specifications.
4. Make sure that the readout and probe, used together as a system, provide the accuracy needed to calibrate the sensor under test.
The calibration system needs to have a higher level of accuracy than the temperature sensor being calibrated. A test accuracy ratio (TAR) of 4:1 or 3:1 is commonly used as a guideline.
5. Decide if additional calibration is required.
In addition to a factory calibration for the probe and the readout, you may want to verify the performance of the probe and readout together with a system calibration. A system calibration provides a higher level of assurance that the instruments are performing as expected when combined together and all probe coefficients are entered correctly into the readout.
For more detailed information about this topic and helpful comparison tables for Fluke Calibration readout/sensor combinations, download the Industrial temperature readout and probe selection guide ».
- Login to post comments
- Printer-friendly version »
- Home
- Products
- New Products
- Electrical Calibration
- RF Calibration
- Data Acquisition and Test Equipment
- Temperature Calibration
- Humidity Calibration
- Pressure Calibration
- Flow Calibration
- Process Calibration Tools
- Calibration Software
- Service and Support
- All Calibration Instruments
- Handheld Test Tools
- Purchase Info
- News
- Training and Events
- Literature and Education
- Service and Support
- About Us


