- Other Fluke companies:
- Fluke
- Fluke Biomedical
- Fluke Networks
- Fluke Process Instruments
How to Calibrate a 67 MAX Infrared Thermometer
This article summarizes what you need to verify that your Fluke 67 MAX Infrared Thermometer is performing within its published specifications. Note that we are only talking about verifying the thermometer, not adjusting it. If your 67 MAX requires adjustment please contact your local Fluke service provider.
For more detailed instructions, please refer to the 67 MAX Infrared Thermometer Calibration Procedure, available on the Fluke website.
What equipment is required?
Verifying a 67 MAX thermometer is challenging due to the product specifications. Most infrared thermometer calibration instrumentation is designed for IR thermometers with much larger specifications and wider temperature range. The 67 MAX level of accuracy requires a special calibration setup. The following is a list of equipment we recommend for getting the job done.
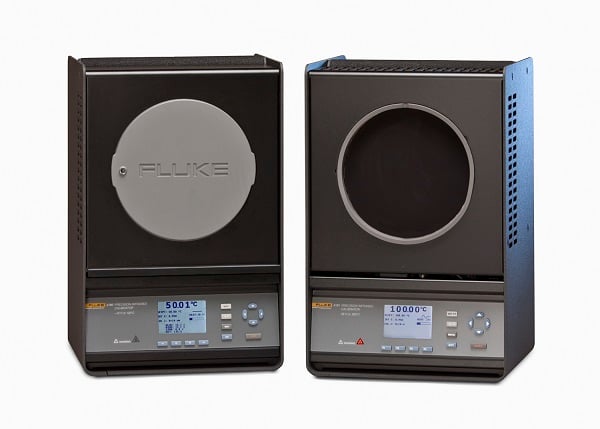
- Infrared black body source
We recommend using a Fluke 4180 Precision Infrared Calibrator.
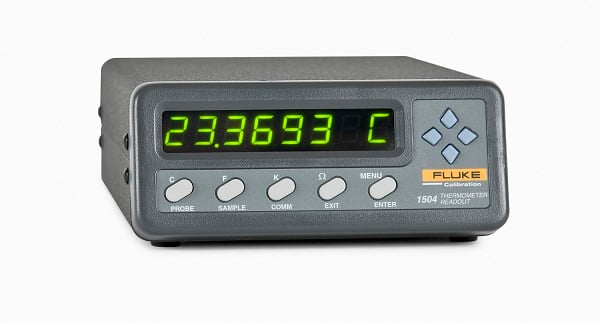
- Reference thermometer readout
You’ll use this device to accurately measure the temperature of the calibrator’s target, to improve the performance of your calibration beyond what the 4180 can do by itself. We recommend using a Fluke 1504 Tweener Thermometer Readout.
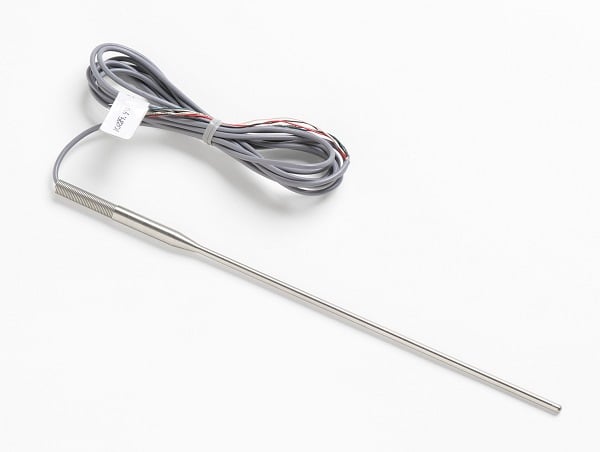
- Reference thermometer
We recommend using a Fluke 5610 Reference Temperature Probe. The probe works with the Tweener to make the reference measurement.
Required equipment and specifications
|
Classification |
Minimum Use Specifications |
Suggested Equipment |
|
|
Black Body Source |
Range: Stability: Resolution: True Emissivity: |
20 °C to 50 °C 0.1 °C 0.01 °C > 0.9 |
Fluke 4180 |
|
Reference Thermometer Readout |
Range: Uncertainty: |
5 kΩ to 10 kΩ 100 µΩ/Ω (0.003 °C) |
Fluke 1504 or better |
|
Reference Thermometer |
Sheath Diameter: Sheath Length: Range: Uncertainty: |
1/8 inch 6 or 9 inches 0 to 50 °C 0.01 °C calibration 0.01 °C long-term drift |
Fluke 5610 |
|
Ambient thermometer |
Uncertainty: |
0.25 °C |
Fluke 2626-S |
Initial inspection and preparation
- Inspect the 67 MAX thermometer.
Check to ensure there is no external damage to the thermometer. It can be damaged by dropping, and damage might not be immediately apparent. While you’re doing this you might also wipe off any dirt and make sure the lens is clear. - Observe documented safety precautions for handling the calibration equipment.
- Prepare the environment in which the equipment will be used. The location should:
- Minimize reflected energy in the environment around the equipment. Eliminate anything greater than 30 °C that might reflect heat off the calibrator and into the thermometer field-of-view (for example, items like a coffee cup or even your hand can affect the measurement).
- Not allow air to blow across the calibration equipment or the thermometer.
Equipment setup
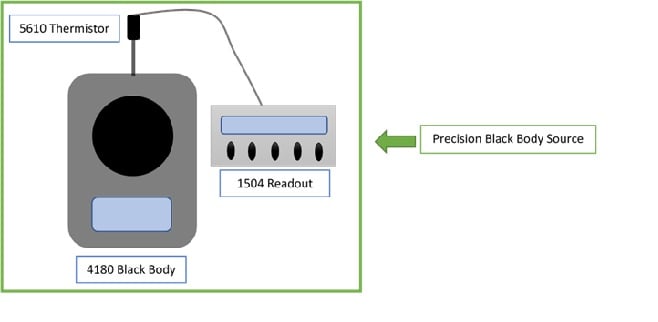
- Set up the 2626-S to log ambient temperature in the calibration area.
- Connect the 5610 probe to the 1504 readout.
- Make sure the calibration coefficients that came with the probe are entered into the readout so it is displaying a calibrated temperature.
- Place the probe inside the IR calibrator.
- The 4180 has a hole in its top that allows you to put the probe in to measure the temperature of the target.
- Configure the 4180.
- Set the 4180 emissivity setting to 0.98 (which matches the emissivity setting of the 67 MAX).
- Set the 4180 emissivity setting to 0.98 (which matches the emissivity setting of the 67 MAX).
- Position and configure the 67 MAX thermometer.
- Ensure the thermometer has been in the calibration area for at least an hour to ensure its internal temperature is close to ambient temperature.
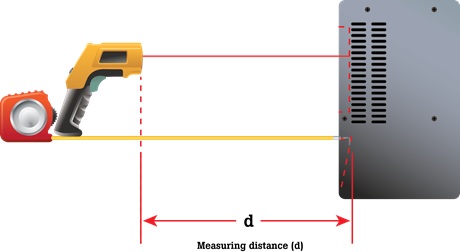
- The thermometer should be 10 centimeters from the front plate of the 4180 and pointing so it is perpendicular to and focused on the center of the plate.
- Turn on the 67 MAX by holding the trigger. Once a measurement is on the screen, press the SEL button so “body ON” is displayed. Press the SET button so “body OFF” is displayed. This turns off the skin-to-body temperature offset used in normal measurement mode and allows the 67 MAX to measure a blackbody correctly.
Taking the measurements
|
Test Points (°C) |
Minimum No. of Samples (Reference Thermometer) |
Minimum No. of Samples (DUT) |
Maximum Reference Thermometer Std. Deviation Limit (1σ, °C) |
Maximum DUT Std. Deviation Limit (1σ, °C) |
Ambient Temperature Limit (°C) [Max – Min] |
|
22 |
5 |
5 |
0.01 |
0.05 |
1 |
|
30 |
5 |
5 |
0.01 |
0.05 |
1 |
|
38 |
5 |
5 |
0.01 |
0.05 |
1 |
|
43 |
5 |
5 |
0.01 |
0.05 |
1 |
- Take five samples of measurements each at a series of four test points, from the reference readout and from the 67 MAX.
- We suggest you alternate, taking a reading from the reference, then taking a reading from the 67 MAX. Do that five times for each test point.
- Record the maximum and minimum temperatures of the ambient condition observed during calibration. Ensure the difference between maximum and minimum is 1 °C or less.
- Calculate the average and standard deviation from each set of the five measurements done at the four different temperatures.
Contact vs infrared temperature measurements
The 5610 and Tweener thermometer are contact measurement instruments. The 67 MAX thermometer is a non-contact infrared radiation measurement instrument. Contact and radiated temperature aren’t the same temperature. If you were using the 4180 in normal mode of operation you wouldn’t have to worry about this because it’s calibrated with radiation thermometry. However, normal mode of operation results in uncertainties that are too large to adequately verify the 67 MAX. When you bypass the normal calibration by using a contact thermometer, as described in this calibration instruction, you need to apply a correction to convert contact temperature to radiated temperature which is what the 67 Max sees..
To help with this, we have included a table of corrections that apply to this calibration. We have a technical note coming soon that will explain the math behind the correction but for the purpose of this article you can use the following table to identify the correction needed for each calibration point. Choose the correction that matches the observed ambient air temperature. (Note: It’s best to linearly interpolate between ambient temperature points to get the best correction value.)
|
Blackbody Contact Temperature |
||||
|
22 °C |
30 °C |
38 °C |
43 °C |
|
|
Ambient °C |
Reference Thermometer Offsets (°C) |
|||
|
21 |
-0.05 |
-0.46 |
-0.84 |
-1.07 |
|
22 |
0.00 |
-0.41 |
-0.80 |
-1.03 |
|
23 |
0.05 |
-0.36 |
-0.75 |
-0.98 |
|
24 |
0.11 |
-0.31 |
-0.70 |
-0.94 |
|
25 |
0.16 |
-0.26 |
-0.65 |
-0.89 |
Note: The offsets listed in this table take into account the emissivity of the 4180 IR calibrator target surface and the ambient air temperature and assumes the 67 Max internal temperature is the same as ambient.
Here is an example of how to use the correction:
- Ambient Temperature Reading = 23.0 °C
- 4180 set to 38.0 °C
- 1504/5610 Reference Temperature Reading = 38.000 °C
- Corrected Reference Temperature = 38.000 °C + (-0.75) = 37.25 °C
- Compare 37.25 °C with the 67 MAX displayed temperature
Calibration uncertainty
We have mentioned a few times that the purpose of this calibration setup is to get to a point where calibration uncertainties are adequate for verifying the 67 MAX. Calibration uncertainty is another complicated topic that will be covered in the upcoming technical note. Using good measurement techniques, described in other Fluke Calibration technical articles like those shown below, this setup can result in a calibration uncertainty of around 0.24 °C. We recommend applying the appropriate guardbanding practices to ensure the risk of false accept is adequate for your calibration program requirements.
Keep Learning
Accurate Fever Scanning with Infrared Forehead Thermometers: Issues, Solutions and How to Calibrate
Related Products
Fluke 4180 Precision Infrared Calibrator
- Home
- Products
- New Products
- Electrical Calibration
- RF Calibration
- Data Acquisition and Test Equipment
- Temperature Calibration
- Humidity Calibration
- Pressure Calibration
- Flow Calibration
- Process Calibration Tools
- Calibration Software
- Service and Support
- All Calibration Instruments
- Handheld Test Tools
- Purchase Info
- News
- Training and Events
- Literature and Education
- Service and Support
- About Us


