- Other Fluke companies:
- Fluke
- Fluke Biomedical
- Fluke Networks
- Fluke Process Instruments
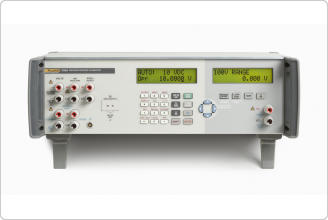
A process calibrator with versatility, precision and value, combined into a single benchtop tool
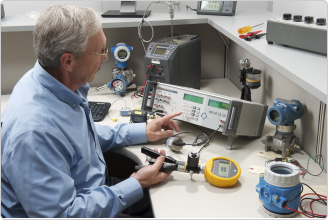
The Fluke Calibration 7526A Precision Process Calibrator offers the best balance of economy and accuracy for benchtop calibration of temperature and pressure process instrumentation. Easily calibrate RTD and thermocouple readouts, pressure gauges, temperature transmitters, digital process simulators, data loggers, multimeters and more.
- Sources and measures dc voltage, current, resistance, RTDs and thermocouples
- Extend pressure measurement range with any Fluke 750P and 700P Series Pressure Modules
- Includes 24 V dc transmitter loop power supply
- Measures 4-20 mA loop current
- Includes automated switch-test function
- Accepts ITS-90 coefficients for accurate SPRT measurements
- Compatible with MET/CAL® Calibration Software
- Includes certificate of calibration traceable to national standards (optional A2LA accredited calibration available upon request)
A “best fit” for your process calibration requirements
“Doing more with less” is a requirement every process manufacturer faces today. To maintain product quality, reduce waste, improve efficiency and conform to regulatory standards, instruments that measure process variables such as temperature and pressure must be calibrated at regular intervals. Selecting the right calibrator for the job, however, can be tricky—especially when attempting to balance precision and versatility with cost. Less expensive than high-end multi-product calibrators, yet more precise and versatile than handheld field calibrators, the 7526A is a “best fit” for instrument shops that value precision, versatility and economy.
Intuitive user interface
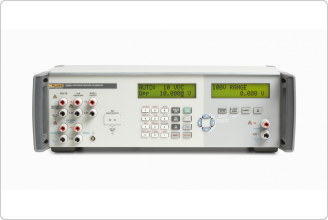
The user interface includes cursor controls, function keys and a ten-key keypad, making it easy to navigate through intuitive menus; store and recall up to nine setpoints for each input/output parameter; enter RTD or SPRT coefficients; and easily change display units with a key press. With two LCD displays, you can easily view both source and measurement results simultaneously.
Increase efficiency through automation
For increased efficiency and calibration throughput, or to operate an automated test system (ATE), combine the 7526A with MET/CAL® Plus Calibration Management Software. MET/CAL Plus is a powerful application for creating, editing and testing calibration procedures and collecting and reporting results on a wide variety of instruments. It includes MET/CAL® software– the industry leading software for automated calibration, and MET/TEAM™ Express–a dedicated system to manage your test and measurement assets. Or choose MET/TEAM™ standard edition for fully-featured enterprise calibration asset management, with optional modules for on-site calibration, commerce management, and customer web portal. The 7526A standard computer interface includes RS-232 and GPIB (IEEE-488). A USB-to-serial adapter cable is also included with the calibrator as standard.
Don’t forget the sensor
Calibrating the electronics portion of a temperature transmitter is only a part of a complete calibration. You also need to calibrate the temperature sensor itself, whether an RTD or thermocouple. Ignoring the sensor can be a mistake, because temperature sensors are responsible for more than 75% of the output errors in temperature transmitters. You can calibrate the temperature sensor individually, or calibrate both the sensor and the transmitter as a system using a dry-block calibrator such as the Fluke Calibration 914X Series Field Metrology Wells. The Field Metrology Wells were designed specifically with process calibration in mind—optimizing speed to temperature, portability, stability and accuracy. The 7526A and a 914X dry-block calibrator make a perfect combination for calibrating just about any temperature transmitter.
Source as well as measure pressure
The P5500 series of comparison test pumps can be used with the 7526A and Fluke 700P and 750P series pressure modules to generate or control test pressures. The unique test port configuration allows for easy, tool-free connections of a wide variety of connection sizes and types, including NPT, BSP, and metric threads. The P5510 includes a built-in hand pump to generate vacuum or positive pressure up to 300 psi (2 MPa). The P5513 allows for precise control of pneumatic pressures up to 3000 psi (20 MPa). An external pressure supply is required. The P5514 allows for generation of hydraulic pressures up to 10 000 psi (70 MPa). The P5515 includes a built-in priming pump and screw pump that allows for pressure generation up to 20 000 psi (140 MPa). Both the P5514 and P5515 can be used with oil or water. Special versions are available with ethylene propylene seals for use with more aggressive fluids.
| DC voltage, output | |||
| Range [1] | Absolute Uncertainty, ± (ppm of output + μV), 1-yr |
Resolution | |
| 0 to 100 mV | 30 | 3 | 1 μV |
| 0 to 1 V | 30 | 10 | 10 μV |
| 0 to 10 V | 30 | 100 | 100 μV |
| 0 to 100 V | 30 | 1 mV | 1 mV |
| TC Output and Input | |||
| –10 mV to 75 mV | 30 | 2 μV | 1 μV |
[1] All outputs are positive only unless otherwise noted
| DC voltage, isolated input | |||
| Range | Absolute Uncertainty, ± (ppm of reading + mV), 1-yr |
Resolution | |
| 0 to 10 V | 100 | 0.2 | 100 μV |
| 10 V to 100 V | 100 | 2.0 | 1 mV |
| DC Current, output | |||
| Range[1] | Absolute Uncertainty, ± (ppm of reading + μA), 1-yr |
Resolution | |
| 0 to 100 mA | 50 | 1 | 1 μA |
[1] For line voltages less than 95 V, ±100 ppm of reading
| DC current, isolated input | |||
| Range | Absolute Uncertainty, ± (ppm of reading + μA), 1-yr |
Resolution | |
| 0 mA to 50 mA | 100 | 1 | 0.1 μA |
| 0 mA to 24 mA [1][2] (Loop Power) |
100 | 1 | 0.1 μA |
[1] Loop Power: 24 V ±10%
[2] HART Resistor: 250 Ω ± 3%
| Resistance, output | |||
| Range | Absolute Uncertainty, tcal ± 5 °C, ± Ohms, 1-yr |
Resolution | Nominal current |
| 5 Ω to 400 Ω | 0.015 | 0.001 Ω | 1 to 3 mA |
| 5 Ω to 4 kΩ | 0.3 | 0.01 Ω | 100 μA to 1 mA |
| Resistance, input | |||
| Range | Absolute Uncertainty, ± (ppm of reading + Ω), 1-yr |
Resolution | |
| 0 Ω to 400 Ω | 20 | 0.004 | 0.001 Ω |
| 0 Ω to 4 kΩ | 20 | 0.04 | 0.01 Ω |
| Sample thermocouple accuracy, input/output (does not include all available TC types)[1] |
|||
| TC type | Temperature Range (°C) | Absolute Uncertainty, tcal ±5 °C, ± (°C), 1-yr [2] |
|
| Min | Max | ||
| J | -210 | 1200 | 0.09 |
| K | -250 | 1372 | 0.1 |
| S | -50 | 1767 | 0.29 |
| T | -250 | 400 | 0.11 |
[1] See extended specifications for all TC types (B,C,E,J,K,L,N,R,S,T,U,XK,BP)
[2] Best accuracy within specified TC temperature range
| Sample RTD and thermistor, output (does not include all available RTD types)[1] |
|||
| RTD Type | Temperature Range (°C) | Absolute Uncertainty, tcal ±5 °C, ± (°C), 1-yr |
|
| Min | Max | ||
| Pt 385, 100 Ω | -200 | 800 | 0.05 |
| YSI 400 | 15 | 50 | 0.007 |
[1] See extended specifications for all RTD types: Pt-100 (385, 3926, 3916), Pt- 200, Pt-500, Pt-1000, Ni-120, Cu-427, SPRT
| Sample RTD and thermistor, intput (does not include all available RTD types)[1] |
|||
| RTD Type | Temperature Range (°C) | Absolute Uncertainty, tcal ±5 °C, ± (°C), 1-yr |
|
| Min | Max | ||
| Pt 385, 100 Ω | –80 | 100 | 0.020 |
| 100 | 300 | 0.024 | |
| 300 | 800 | 0.038 | |
| YSI 400 | 15 | 50 | 0.007 |
[1] See extended specifications for all RTD types: Pt-100 (385, 3926, 3916), Pt- 200, Pt-500, Pt-1000, Ni-120, Cu-427, SPRT
| General specifications | ||
| Standard interface | RS-232, IEEE-488 (GPIB) | |
| Temperature performance |
Operating: | 0 °C to 50 °C |
| Calibration (tcal): | 18 °C to 28 °C | |
| Storage: | –20 °C to 70 °C | |
| Electromagnetic compatibility |
CE: Conforms to EN61326; operation in controlled EM environments |
|
| Temperature coefficient | Temperature coefficient for temperatures outside tcal 5 °C is 10% of the 90-day specification (or 1 year if applicable) per °C |
|
| Relative humidity | Operating: | <80% to 30 °C |
| <70% to 40 °C | ||
| <40% to 50 °C | ||
| Altitude | Operating: | 3,000 m (9,800 ft) max |
| Non-operating: | 12,200 m (40,000 ft) max | |
| Safety | EN/IEC 61010-1:2010 3rd Edition, UL 61010-1:2012, CAN/CSA 22.2 No. 61010-1-12 |
|
| Analog low isolation | 20 V | |
| Line power | 120 V~: | 100 V to 120 V |
| 240 V~: | 220 V to 240 V | |
| Line frequency | 47 Hz to 63 Hz | |
| Line voltage variation | ± 10 % about setting | |
| Power consumption | 15 VA maximum | |
| Dimensions | Height: | 14.6 cm (5.75 in) |
| Width: | 44.5 cm (17.5 in) | |
| Depth: | 29.8 cm (11.75 in) | |
| Weight (without options) |
4.24 kg (9.35 lb) | |
| Model Name | Description |
|---|---|
| 7526A |
Precision Process Calibrator Includes traceable calibration report, user manual CD, getting started guide, power cord, thermocouple shorting jumper and USB-to-serial adapter cable. |
Accessories common to all models:
| Accessory | Description |
|---|---|
| Y7526A |
Rack Mount Kit
|
| 7526A-CASE |
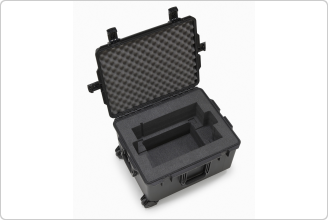
Carrying Case for 7526A |
| 700LTP-1 |
Low-pressure Test Pump |
| 700HTH-1 |
Fluke 700HTH-1 Hydraulic Test Hose |
| 700HTP-2 |
Hydraulic Test Pump |
| 71X |
Hose Kit Accessory |
| 700ILF |
In-line Filter |
| 700TC1 |
Thermocouple Plug Kit 700C1 |
| 700TC2 |
Thermocouple Plug Kit 700TC2 |
| Fluke 750P Series Pressure Modules |
Pressure Module Series |
| 5520A-525A/LEADS |
Test Lead Set |
| Specifications |
|---|
| Press Releases |
|---|
| The new Fluke Calibration 7526A Precision Process Calibrator delivers economy and accuracy |
- Home
- Products
- New Products
- Electrical Calibration
- RF Calibration
- Data Acquisition and Test Equipment
- Temperature Calibration
- Humidity Calibration
- Pressure Calibration
- Flow Calibration
- Process Calibration Tools
- Calibration Software
- Service and Support
- All Calibration Instruments
- Handheld Test Tools
- Purchase Info
- News
- Training and Events
- Literature and Education
- Service and Support
- About Us
Sidebar Request a Quote
Request a quote


