- Other Fluke companies:
- Fluke
- Fluke Biomedical
- Fluke Networks
- Fluke Process Instruments
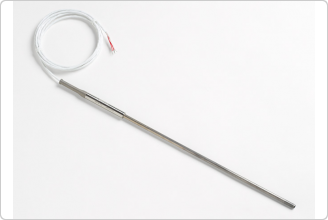
5616 Secondary Reference PRT
This product is discontinued.
Please see the 5615 Secondary Reference Temperature Standards.
Durable, accurate sensor for use in the factory, field or lab
- Temperature range: –200 °C to 420 °C
- Excellent stability: ± 10 mK
- Calibrated accuracy ± 0.011 °C at 0 °C
- Reference-grade platinum sensing element
- NIST-traceable calibration included
You won’t find another NIST-traceable reference temperature sensor that matches the accuracy and temperature range of the 5616 for the same price.
The 5616-12 is a 100-ohm platinum resistance thermometer (PRT) with excellent short-term repeatability and comes with an unaccredited NIST-traceable calibration.
The temperature range of the 5616 covers –200 °C to 420 °C, and its high-purity platinum element and durability make it great for calibrating in the lab or in the field. When choosing a reference with a platinum element, there are two things you want to look at carefully: the short-term repeatability and the long-term drift. When PRTs are thermally cycled over their temperature range as they would be during a calibration, their resistance at the triple point of water can move up and down within an expected range. Fluke Calibration defines this range (called “short-term repeatability) as the repeatability at the triple point of water during three thermal cycles. 5616s are among the best performing in their class with short-term repeatability better than ± 0.010 °C (± 0.004 °C is typical). In addition, the 5616’s drift is ± 0.007 °C at the triple point of water when exposed up to its maximum temperature (420 °C) for 100 hours. These specifications are given at k=2 and therefore include a 95 % confidence level.
The 5616’s sealed ¬INCONEL® 600 sheath is 298 mm (11.75 in) long and 6.35 mm (0.250 in) in diameter. The probe’s PTFE-jacketed cable is made of silver plated copper that ends with four-wire leads, which eliminate the effects of lead-wire resistance on measurements. Use the 5616 with Fluke Calibration’s 1523/1524 Handheld Reference Thermometer, 1560 Black Stack, 1529 Chub-E4, or 1502A Tweener thermometer readouts.
Each sensor comes with a manufacturer’s report of calibration. The report includes the expanded uncertainty (k=2) at seven calibration temperature points, ITS-90 calibration coefficients, and a temperature vs. resistance table presented in 1 °C increments. Compare the 5616 to other Secondary Reference PRTs. You’ll like its price, but you’ll love its performance.
Specifications |
|||||||||||||||||||||
| Parameter | Value | ||||||||||||||||||||
| Temperature range | −200 °C to 420 °C | ||||||||||||||||||||
| Nominal resistance at 0.01 °C | 100 Ω ± 0.5 Ω | ||||||||||||||||||||
| Temperature coefficient | 0.003925 Ω/Ω/°C nominal | ||||||||||||||||||||
| Calibrated Accuracy[1] (k=2) |
± 0.012 °C at −200 °C ± 0.011 °C at 0 °C ± 0.028 °C at 420 °C |
||||||||||||||||||||
| Short-term repeatability[2] | ± 0.007 °C at 0.010 °C | ||||||||||||||||||||
| Drift[3] | ± 0.007 °C at 0.010 °C | ||||||||||||||||||||
| Hysteresis | ± 0.010 °C maximum | ||||||||||||||||||||
| Sensor length | 50.8 mm (2.0 in) | ||||||||||||||||||||
| Sensor location |
9.5 mm ± 3.2 mm from tip (0.375 in ± 0.125 in) | ||||||||||||||||||||
| Sheath diameter tolerance | ± 0.08 mm (± 0.003 in) | ||||||||||||||||||||
| Sheath material | INCONEL® 600 | ||||||||||||||||||||
| Minimum insulation resistance | 500 MΩ at 23 °C | ||||||||||||||||||||
| Transition junction temperature range[4] | −50 °C to 150 °C (see footnote) | ||||||||||||||||||||
| Minimum immersion length[5] (< 5 mK error) |
102 mm (4.0 in) |
||||||||||||||||||||
| Maximum immersion length | 254 mm (10 in) | ||||||||||||||||||||
| Response time[5] | 8 seconds typical | ||||||||||||||||||||
| Self heating (in 0 °C bath) | 60 mΩ/°C | ||||||||||||||||||||
| Lead-wire cable type |
PTFE-jacketed cable, PTFE insulated conductors, 24 AWG stranded, silver plated copper | ||||||||||||||||||||
| Lead-wire length | 182.9 cm ± 2.5 cm (72.0 in ± 1.0 in) | ||||||||||||||||||||
| Lead-wire temperature range | −50 °C to 150 °C | ||||||||||||||||||||
| Calibration | NIST-traceable calibration | ||||||||||||||||||||
| [1]Includes calibration uncertainty and 100 hr drift. [2]Three thermal cycles from min to max temp, includes hysteresis, 95 % confidence (k=2) [3]After 100 hrs at max temp, 95 % confidence (k=2) [4]Temperatures outside this range will cause irreparable damage. For best performance, transition junction should not be too hot to touch. [5]Per ASTM E 644 |
|
||||||||||||||||||||
| Model Name | Description |
|---|---|
| 5616-12-X |
Secondary Reference PRT, 6.35 mm x 298 mm 0.250 x 11.75 in), –200 °C to 420 °C (Calibration traceable to NIST standards included. Not RoHS compliant.) X = termination. Specify “A" (INFO-CON for 914X), “B" (bare wire), “D" (5-pin DIN for Tweener Thermometers), “G" (gold pins), “J" (banana plugs), “L" (mini spade lugs), “M" (mini banana plugs), “P" (INFO-CON for 1523 or 1524), or “S" (spade lugs). |
Accessories common to all models:
| Accessory | Description |
|---|---|
| 2601 |
Probe Carrying Case, Plastic |
| Product Manuals |
|---|
- Home
- Products
- New Products
- Electrical Calibration
- RF Calibration
- Data Acquisition and Test Equipment
- Temperature Calibration
- Humidity Calibration
- Pressure Calibration
- Flow Calibration
- Process Calibration Tools
- Calibration Software
- Service and Support
- All Calibration Instruments
- Handheld Test Tools
- Purchase Info
- News
- Training and Events
- Literature and Education
- Service and Support
- About Us
Sidebar Request a Quote
Request a quote


